Hi all! I went into an Angry Birds mood and couldn't resist using these fimo pieces!
I used OPI's Fiercely Fiona and Face Shop's RD301 as base colors for this nail art.
To see a swatch of Fiercely Fiona you can click here. I also did another nail art not too long ago with lots of Yellowy Goodness. And of course as a base for an Easter nail art last year.
For a swatch of Face Shop's RD301 click here. And I also did Strawberry nails using this polish. Twice. Before going to the Harry Potter exhibition I had Harry Potter nails with this polish too.
The picture at the top of the pose was in the sun, and the one here was taken in my room. As you can see the yellow really seems to change with lighting from a bright yellow to a soft pastel yellow. My fimo pieces fell off pretty much within the next few days. I do have nail glue and you can use nail glue for fimo pieces if you like but I find it nearly impossible to remove. Haha.
If you would like to see how to apply fimo pieces, click here.
That's all for today! Till next time, Byee!
Doing my nails is a hobby of mine. From time to time I do something that I am extremely proud of. Anything to do with nails will be chronicled here.
Showing posts with label Faceshop. Show all posts
Tuesday, 11 September 2012
Monday, 3 September 2012
Fimo Chickys!
Hi guys today will just be a really short post on what I did eons ago. (trust me I have been doing my nails!)
Anyways I decided to do a quick Fimo nail art using the chick fimo pieces. They are adorable! And as base color I used Faceshops bright blue (BL602). You can click here to see how I used this as a base for rainbow nails, and also as a base for silver shatter. I also used this in a more elaborate nail art for last year's Easter.
That's all for today! I do have loads more...but I'm swamped with work! Ahhhhh :(
Till next time, Byee~
Anyways I decided to do a quick Fimo nail art using the chick fimo pieces. They are adorable! And as base color I used Faceshops bright blue (BL602). You can click here to see how I used this as a base for rainbow nails, and also as a base for silver shatter. I also used this in a more elaborate nail art for last year's Easter.
That's all for today! I do have loads more...but I'm swamped with work! Ahhhhh :(
Till next time, Byee~
Tuesday, 3 July 2012
Harry Potter Nails!
Hi everyone! What with the Harry Potter exhibition being in Singapore and all, I decided to do some Harry Potter inspired nails :) I had a Slytherin one, while my friend did Gryffindor's. I also managed to do a pictorial! This is easier than it looks, really and all you need is a steady hand and a calm mind. Heh. Here goes!
2) Using another color (I used a golden green instead of a silver because I felt it complemented the forest green better) fill in the other half of the nail.
3) Then using the other color (golden green) paint the top half of the forest green.
4) Using forest green, go over the top half of golden green, giving you the pattern you see on my middle, ring and little finger.
5) Optional: Paint a top coat and carefully apply a rhinestone (I used light green) in the middle of the nail. This allows you to cover up any imperfections. For example, if the centre of the nail is not perfectly right-angled.
6) Optional: If you like, you can place a few 3D steel balls along the lines where the colors meet. I felt it made the design too messy so I stopped after doing 3 nails.
This is what I was left with! Tada! Products I used for Slytherin nails were Jolly Holly and Peace on Earth from China Glaze. Click here for the swatch and review of Peace on Earth and here for other nail art I have done with it. Click here for a swatch of Jolly Holly and here for a nail design where I used Jolly Holly as a konad polish.
Products used for my friend's Gryffindor nails is BK nail polish in color 06 (gold) and Faceshop's RD301 (red). Click here for a swatch on BK nail polish and here for a swatch and konad nail art of Faceshop's RD301. I have also used Faceshop's RD301 in strawberry nail designs which can be found here and here.
For both nail designs I have used round rhinestones which can be found in my shop on Facebook. You can click here to see my first attempts with rhinestones, here to see how I paired up rhinestones with konading, and here to see how I used rhinestones to create a classy nail look.
3D steel balls were used on 3 of my nails, you can click here to see how I used them to create sea themed nails. 3D steel balls can also be found in my shop on Facebook.
Sorry for the lengthy post, I really hope you enjoyed this pictorial, There is yet another one coming up in the next post! So as always, if you haven't already give my Facebook shop a like so you can keep up to date with the latest blog posts and deals. And till next time, Byee~
Tuesday, 27 March 2012
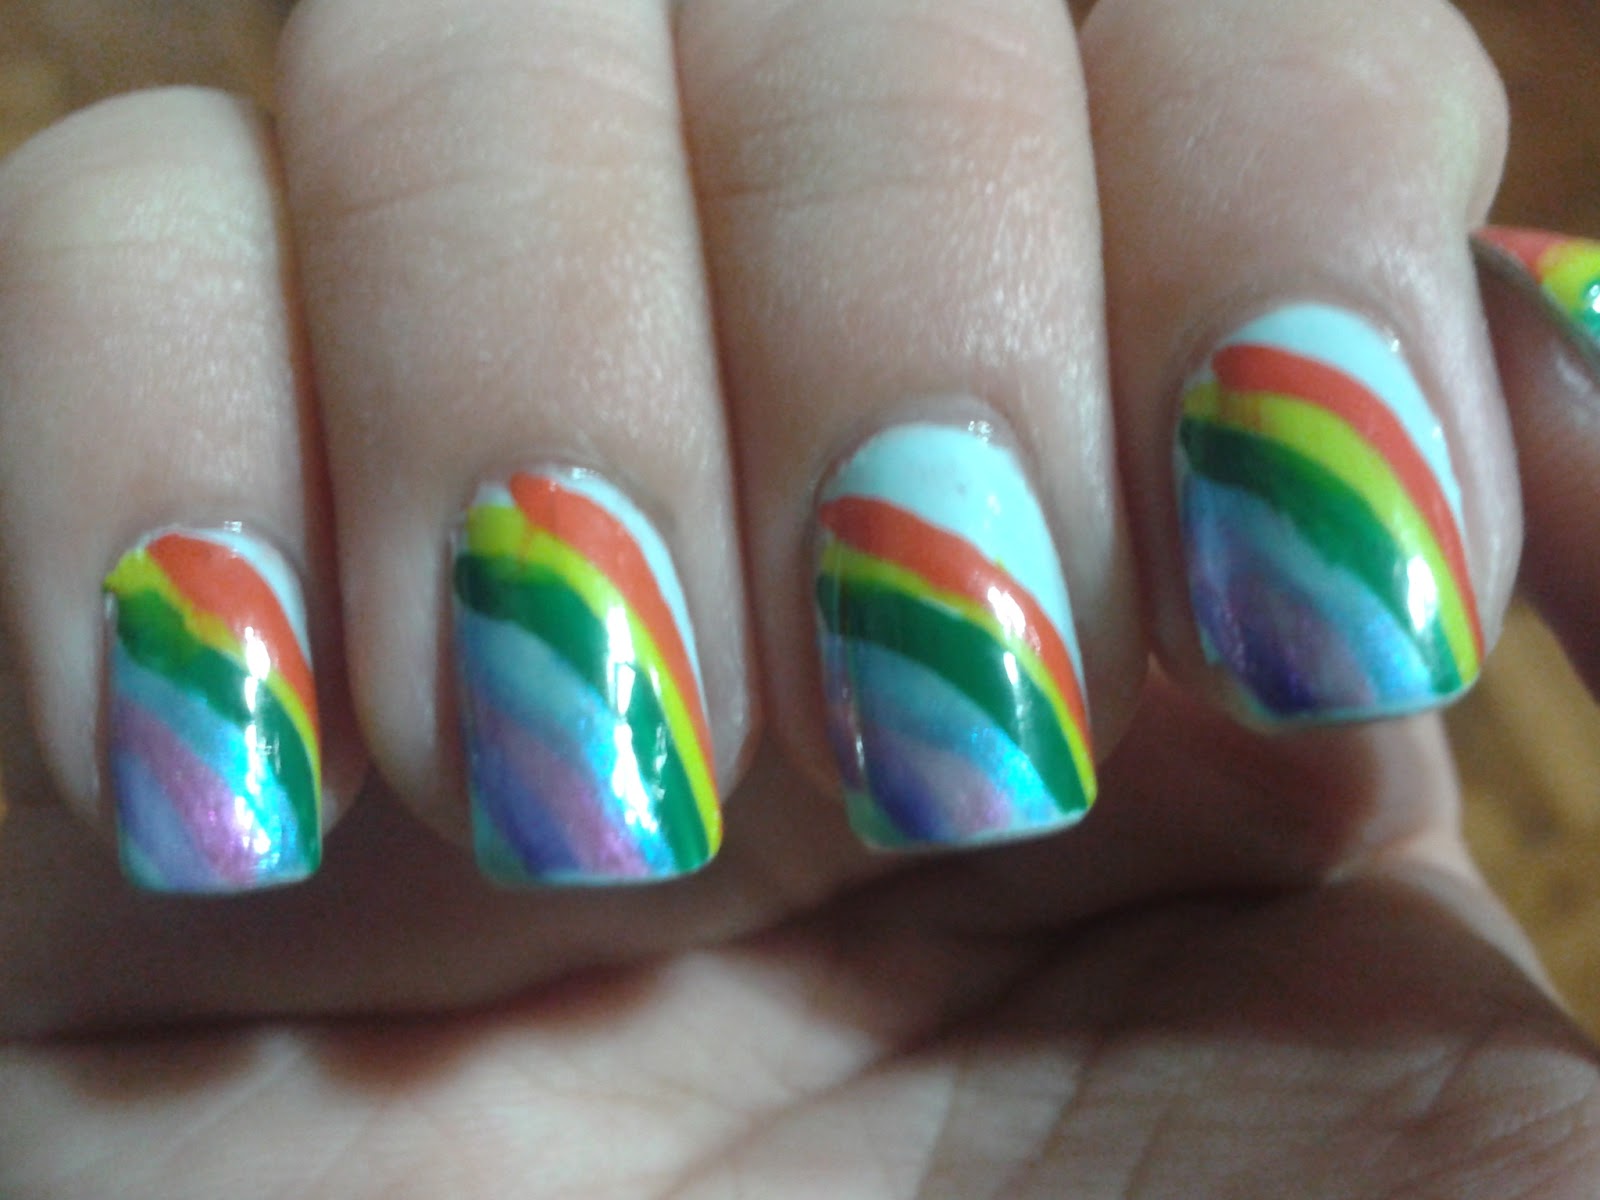
Rainbow nails!
Hi guys! About a week ago, I did rainbow nails with every intention of making it the best ever! But it was not to be...you'll see why later!
First I started off with a blue base coat from Faceshop. And since I had to go off to tuition I left it like this. Not a bad start right?

While I tuition I somehow got into my head that I had a cloud shaped konad template...and I was so excited for a rainbow sky themed nail art. Then I got home, and realised that it was something that I considered buying but didn't buy. Nothing else to do but start using my two-way nail brush and pen in all 7 colours, hoping it'll turn out great.
I ended up with this.
What do you think? It's a bit of a fail to me, but from a distance it actually looks quite good so I would say this is not bad. I even have compliments on it from friends and a random nurse at the blood donation centre :)
Just received my very first bottle of Nfu Oh today! Super excited to try it out whee! Till next time, Byee~
Saturday, 16 July 2011
The Face Shop BL602 with OPI Silver Shatter
Hi all! A few days ago I received OPI's silver shatter from one of my friends and I just could not wait to try it out! After digging around in my nail polish drawer I finally decided on pairing it up with a light blue from Face Shop that I haven't used in ages.

Here are the things I used:
Posche Base Coat (It's great!!)
The Face Shop BL602
Seche Vite
Silver Shatter
Face It Top coat (I didn't want to use up my tiny bottle of Seche Vite too quickly)
The new Posche base coat was supposed to help with dry, brittle, weak and peeling nails. Since this is the first time I've used it I'll have to wait and see before I see any obvious result. My nails have been peeling lately so we'll see if this helps!


Face Shop's BL602 was not the best, coming out really streaky in the first coat and needing about 4 coats for it to cover your nail evenly. Usually this would be enough to deter me from using it but with the Silver Shatter I also received a tiny 0.125oz bottle of Seche Vite from my friend. It worked like a dream. Within 10min I could touch my nails no problem and in half an hour I could go about doing my things as usual.
Silver Shatter from OPI was great! A thinner coat will get you smaller and more intricate cracks, but the patches would be slightly translucent. So I used thicker coats of Shatter to get a more opaque coverage.
In hindsight it would probably have been better if I paired it up with a much darker color. Under bright sunlight it was really hard to tell if the blue was even there. That's all I have for you today, till next time, Byeee~~
Wednesday, 13 July 2011
Strawberry Nails Variation II
Hi all! Today I have another strawberry nail design for you. If you remember, I wasn't completely satisfied with the nail design I did back then. So I kept everything the same this time except for the accent nails. Also a couple of people requested for tutorials, so here is a picture tutorial.


Here are the things I used in this nail design:
Top coat (I ran out of base coat)
The Face Shop RD301
The Face Shop GR501
Two-way Nail Brush and Pen in white and green

First off I applied a layer of top coat (cos I didn't have base coat). And then I covered half of the non-accented nails with red polish, and started doing the gradient for my accent nails. You can learn how to do this from the tutorial below. Jen from FromHeadToToe is great with pretty much everything and I used this method to create the gradient. It takes time, but it works.

After that, I used the Two-way nail brush and pen to draw in the leaves, on both the accented and non-accented nails, and stuck on my half strawberry fimo piece using a clear top coat. I used nail glue the last time, and it took a really long time for me to get it off. Using nail polish as adhesive worked just fine.
Finally, all you have to do is draw three white dots on the strawberry, wait for it to dry and apply a top coat! It's pretty simple but it does require concentration and patience. Especially while waiting for the gradient nail art to dry!
I hope you enjoyed this tutorial, till next time, Byee~~
Tuesday, 14 June 2011
Strawberry nails!
Hi everyone! Recently I went shopping and I came across a few Fimo sticks and I bought one that looked like a strawberry cut in half. Ever since then I have been dying to use it and finally I did! I must say the accent nail was quite a disappointment. Cutting the Fimo pieces took abit of practice, and somehow, it doesn't look as satisfying. Doesn't matter though I'm sure I can think of other nail designs for this Fimo shape.
Here are the things I used for this design:
Base and top coat
The Face Shop RD 301
Sally Hansen's Insta-Dri in Mint Sprig
Two-way Nail Art Pen and Brush in white and green
that Fimo cane stick
Nail glue


For the non-accented nails, I painted half of the nail red, and then drew in the leaves using the nail art pen. After that, I used the nail art pen to dot in the seeds. I've tried dotting in more than 3 seeds, but they just looked odd. 3 seeds seemed to look the best.
For the accented nails, I used Sallen Hansen's Insta Dri in Mint Sprig to create a french tip, then I stuck on the Fimo at the side. I tried drawing in leaves, but my leaves were too small. So I just covered the too-small leaves with the Fimo pieces.
Everything looks great, I mean the strawberries are adorable (maybe one day I should give the strawberries cute faces). But! My accent nails are a disappointment. Gotta think of something with more oomph!
I was gonna remove the nail polish immediately after taking pictures, but it has grown on me. Maybe I'll keep it for a while. Till next time! Byeee~~
Sunday, 12 June 2011
The Face Shop RD301 with Konad M57

Hi all! After that disappointing girly pinky pink nail design, my nail peeled and I had to cut my nails really short. Because my nail beds are really small and my hands are really small, I was left with child hands. So, I put on the most mature yet not middle aged nail colour. Bright red!
I used Faceshop's colour this time. True reds are notorious for having really thin coverage but I achieved complete opacity in just 3 coats. Maybe it's cos my nails are too short to tell. But I'm really happy with it. This is what it looks like indoors. Outdoors in the sun it'll turn a bright red. I never really liked bright red, but this time I'm a convert.
Here are the things I used:
Top coat and base coat
The Face Shop RD301
Konad M57 plate
China Glaze Millenium
Konad Top Coat

So having a red base with black leopard print Konad has been a design that's been floating around in my head for a while now. But since China Glaze's Millenium is so pigmented, I decided to brighten up the whole look by putting in silver leopard prints instead. I was not disappointed.
Please ignore the index finger, it was messed up from being scratched by something in the midst of drying. Such a pity. Anyway! There're a few nail designs that I've been dying to try. So I'll probably be changing my nails at a higher frequency now. Till next time, Byeee~~
Sunday, 5 June 2011
Panda Nail Art!: The Face Shop PP401 with Konad M56, S10 and M10

Hi all! Today is probably one of the most time consuming but rewarding nail art for me. I was inspired by this nail art that my cousin did.

Also I found an awesome website here, giving lots of tips about how to do a good Konad tutorial. She recommended changing from a metal scraper to a plastic scraper or an old credit card. I used an old ATM card, and it worked like a dream. Seriously, it was the best Konad I've done so far. Awesomeness.
Here're the things I've used for this nail art:
Top and Base Coat
The Face Shop PP401
Black Special Polish
Konad Top Coat
China Glaze Jolly Holly (for the leafy bottom)
Konad plates M56, M10 and S10


Remember the Easter nail art I did? Here's the long promised swatch of this awesome super light, frosty pink. I used it as the base for the Panda nail art.
After that I Konad-ed on the pandas using Konad plates M10 and S10. See that panda in a one piece suit with a hoodie (on my index finger)? So cute. Then I drew on the pandas on my thumb and ring finger using the Two-way Nail Brush and Pen. Tip here, don't squeeze out a large blob. It'll take forever to dry. Also it'll start to spread when it dries. ><
Then after waiting for the pandas to dry, I Konad-ed on the leafy french tip (looks like bamboo! or a forest..) using China Glaze's Jolly Holly. Top it off with the Konad top coat and you're done!
The Konad top coat is to prevent smudging of the Konad prints. Using this top coat there is no problem with smudging whatsoever. Great stuff!
So there you go, I know it looks slightly messy up close and there's that scratch on my index finger...but from far it looks so adorable! Till next time, byeee~
Tuesday, 17 May 2011
Blue Sparkly Gradient!
So remember that haul from lets-nail-it? Well I helped my cousin buy some too and I just couldn't resist trying out her Color Club sparkly nail polish. Look at it in all it's sparkly goodness!

OK so I did a really dark blue base from Faceshop. That polish was one of the first nail polishes I got. It was probably nearly a year old. And fit for the bin. It was gloopy and dry and everything a good nail polish shouldn't be. So yes. I did love that shade so it was a sad moment.
So, I used Color Club's Sexy Siren as the glitter and to do the gradient glitter you dab from the tip towards the nail bed. That glitter is very pigmented and fine. Which is great if you want to get glitter everywhere like it's a regular polish, but bad if you want a gradient. It didn't fade into the dark blue as gradually as I would have liked.
I disliked it so much I nearly removed it after three days and I would not stop picking at it. But because I put on two layers of top coat to smoothen out the glitter, pretty much nothing happened.
It did grow on me though, in dark places it looked especially magical, when random flashes of light hit my nails it would flash teal, green, blue. So gorgeous.
Now it's back to more adventurous Konading! *cheers*
Saturday, 23 April 2011
Happy Easter!
Warning: This is a pretty lengthy post.
Happy Easter everyone! I got my inspiration at this post from www.frmheadtotoe.com. Ya know, I didn't really think about doing a tutorial till I was done with both hands. Shows you how smart I am huh.
Anyway, here is what I used for my Easter nail art. I used pastel colours as a base, and painted a rabbit on my index finger, a chick on my ring finger, and painted the rest to look like Easter eggs. I googled "Easter eggs patterns" so I know what to draw heehee.
First I used a Faceshop basecoat, and the polishes are named accordingly from thumb to pinky.
Thumb: Gargantuan Green Grape by OPI
Index: PP401 by The Faceshop
Middle: BL602 by The Faceshop
Ring: Fiercely Fiona by OPI
Pinky: 63 by Rainbow (a random brand from Sasa)
To paint in the bunnies and dot my nails, I used my two-way nail brush and pen. It really is very handy and I find it so much easier to do nail art now as compared to using brushes or tape-stencils* or matches/toothpicks.
Unfortunately the two-way nail brush and pen does not colour code their nail polish so I can't tell you exactly what I used.
Thumb:
Because the thumbnail is the biggest nail I decided to do the most intricate pattern on it. On top of a pastel green I used a hot pink to zigzag across the nail and then an orange to outline it. It was supposed to be a sparkly orange, but somehow the sparkles didn't transfer to the tip. It still looks ok though. The nail still looked empty, so I accentuated it using yellow dots.
Index:
Have you ever realised that when you point at things or order something from the menu you would be showing your index finger (unless you normally point with your middle finger). So I used the most eye-catching pattern on my index finger. I used PP401 by the Faceshop as a base, and outlined a bunny before filling the rest in. That pink is so cute! It's got a pearly sheen and it's such a delicate pink. Perfect for bunnies. I suggest putting in as little black as possible. After that dot two ovals for eyes, and one red dot for the nose. Then dot the eyes with a tiny bit of white. That way it'll look more lively :)
Middle:
The middle finger is still reasonably big, so I drew purple stripes across the blue nail. I must say it turned out really nicely. Definitely doing this for all my nails someday when Easter is over. I did vertical stripes for my right middle finger. If you do try out vertical stripes, draw thinner stripes.
Ring:
The chick is probable one of the easiest to draw, because all you really need to do is dot the eyes (both white and black), and draw a little triangle for the chick's beak. I don't really know what I can do to make it look more chick-like. Jen from frmheadtotoe had jagged white eggshells at the bottom which I didn't bother myself with. But when I showed it to my sister she thought it was a happy face. So now I can't look at my chick without thinking about happy faces xD
Pinky:
The easiest to do! I like dots. Somehow something that is so simple can jazz up your nail. I used white from the two-way nail brush and pen to dot all over. But using a toothpick or matchstick (depending on how big you want your dots) will do fine too. I over-dotted my pinky in the picture. But on the other finger, it has less dots and it looks better than the over-dotted pinky.
So in case you want to attempt nail art from one of the nails without attempting the whole thing, here they are in order of difficulty from most difficult to easiest:
1) Rabbit
2)Zig-zag easter egg
3) Stripes
4) Chick
5) Dots
I feel like this is a really text-heavy post. I should take more pics during the painting process. This whole nail art probably took me about 3 hours including drying time. I topped it all off with the Faceshop top coat. That is all for today. Bye~
*I don't know what the real name is called but to do nail art easily you can cut out the shape of your nail art, stick it onto the nail and colour in the background. Yep. So. Much. Effort!
Subscribe to:
Posts (Atom)