Showing posts with label Two-way Nail Brush and Pen. Show all posts

Tuesday, 27 March 2012

Rainbow nails!

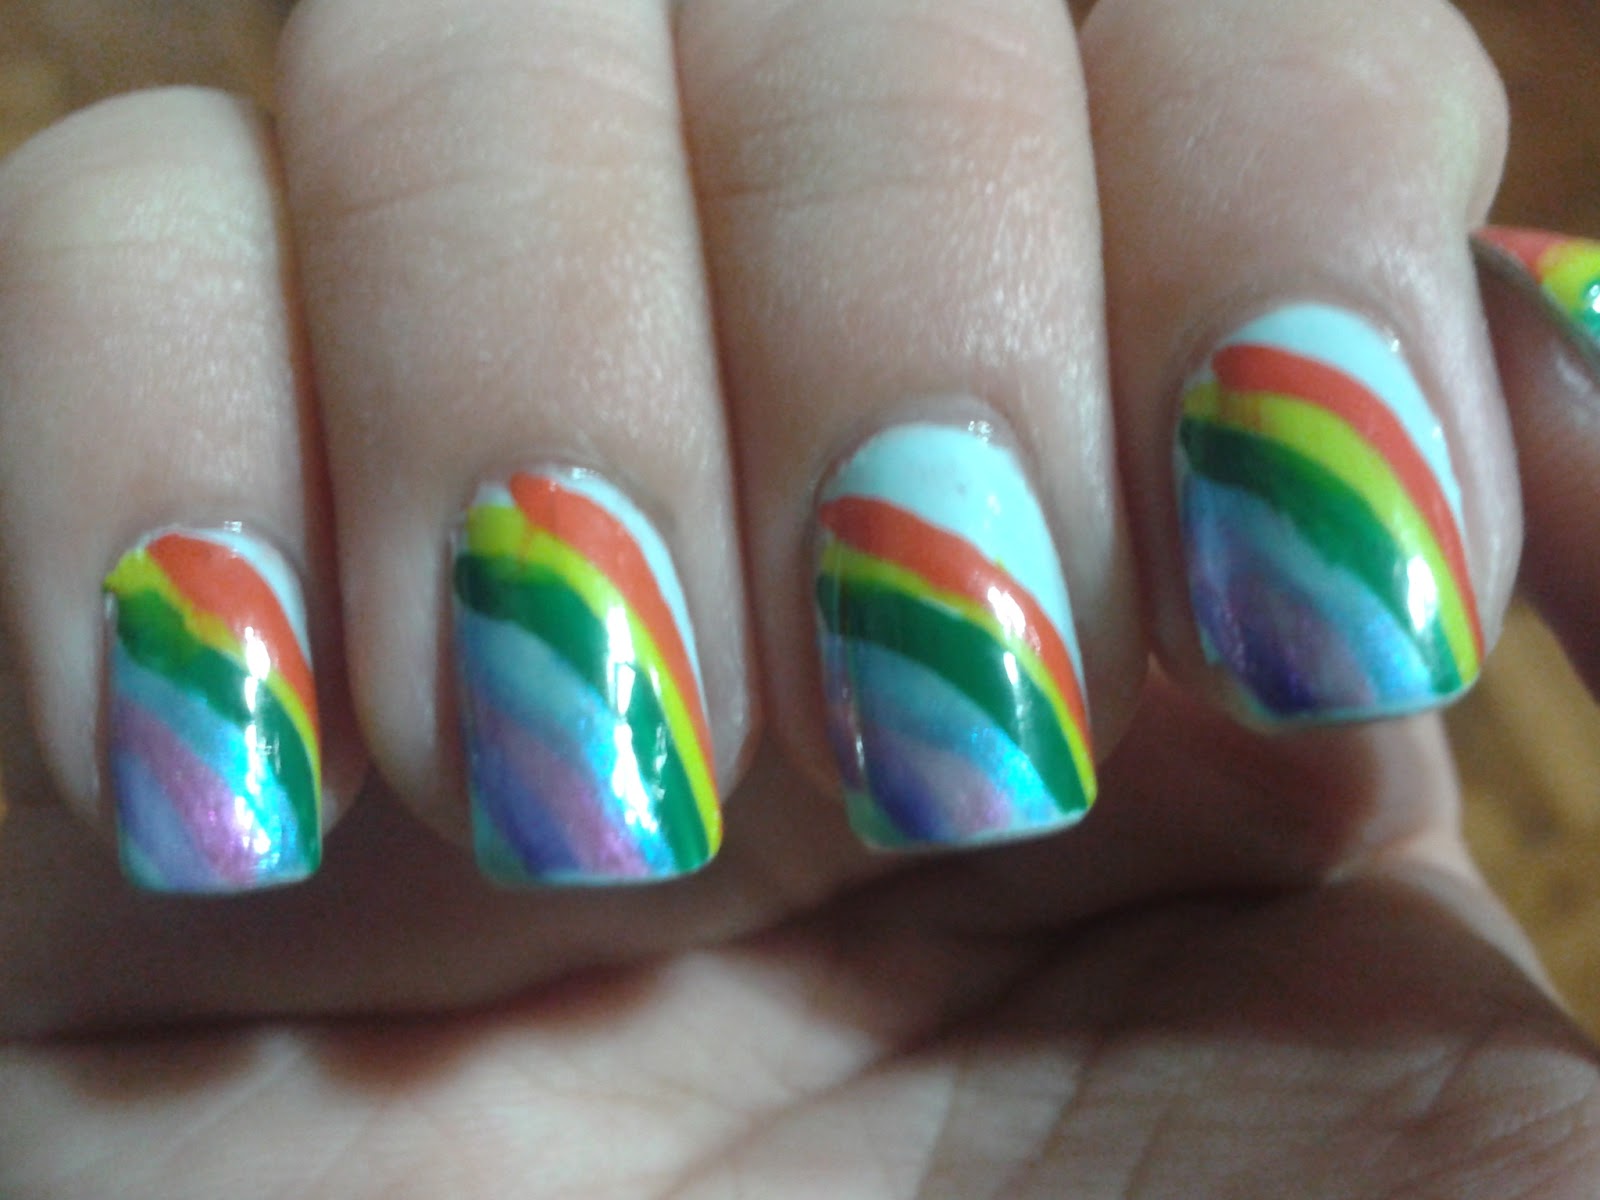
Hi guys! About a week ago, I did rainbow nails with every intention of making it the best ever! But it was not to be...you'll see why later! 

First I started off with a blue base coat from Faceshop. And since I had to go off to tuition I left it like this. Not a bad start right? 

While I tuition I somehow got into my head that I had a cloud shaped konad template...and I was so excited for a rainbow sky themed nail art. Then I got home, and realised that it was something that I considered buying but didn't buy. Nothing else to do but start using my two-way nail brush and pen in all 7 colours, hoping it'll turn out great.

I ended up with this.
What do you think? It's a bit of a fail to me, but from a distance it actually looks quite good so I would say this is not bad. I even have compliments on it from friends and a random nurse at the blood donation centre :)
Just received my very first bottle of Nfu Oh today! Super excited to try it out whee! Till next time, Byee~

Monday, 17 October 2011

Picture Bomb!

Hi all! I'm so sorry I haven't been updating. School takes up more time than I ever imagined. My lack of presence on this blog, however, does not mean that I have not been doing nail art conscientiously :)

The nail art above is done using my matt black polish (I still don't have regular black polish), and Konad plate M80 using China Glaze's Millenium. During Hari Raya this year, I wore a baju kurong which was black and had identical flower patterns along the seams. Imagine how happy I was when I discovered my Konad plate matched the flower pattern. :D

This rainbow nail art above had been on my mind for a while, I just lacked the guts to do it.  If I could say so myself, I think it turned out surprisingly well. Nearly everyone I met commented on it. This was done using the two-way nail brush and pen.
Here's a slightly clearer look. Excuse the chipping, it had been my my hands for about 5 days. I would say it held up admirably considering I felt the polish was not that great to begin with.

This above is OPI's Play the Peonies paired up with a black crackle french tip. I got tired of the crackle fad really quickly and I confess, I'm not a huge fan.  But! I love this french tip. It looks like a lacy french tip from far.

 Another huge huge <3, Canmake's glitter polish. My cousin gave it to me, saying it did not work for her. I, on the other hand, loved it. It is a wonderful bright bright blue and is so wonderfully glittery. Downside is, I had to put four coats in order to get this above but the depth of the glitter is just spellbinding. There's another shot below to see how sparkly it is. The different sized sparkles really made a difference.

So that's all for today my loyal fans (you are loyal if you still come here after I've gone missing for more than a month). I have more awesome nail polish on my nails at the moment and I just can't wait to share it with you!

Till next time, Byee~~

Wednesday, 13 July 2011

Strawberry Nails Variation II

Hi all! Today I have another strawberry nail design for you. If you remember, I wasn't completely satisfied with the nail design I did back then. So I kept everything the same this time except for the accent nails. Also a couple of people requested for tutorials, so here is a picture tutorial.

Here are the things I used in this nail design:
Top coat (I ran out of base coat)
The Face Shop RD301
The Face Shop GR501
Two-way Nail Brush and Pen in white and green

First off I applied a layer of top coat (cos I didn't have base coat). And then I covered half of the non-accented nails with red polish, and started doing the gradient for my accent nails. You can learn how to do this from the tutorial below. Jen from FromHeadToToe is great with pretty much everything and I used this method to create the gradient. It takes time, but it works.


After that, I used the Two-way nail brush and pen to draw in the leaves, on both the accented and non-accented nails, and stuck on my half strawberry fimo piece using a clear top coat. I used nail glue the last time, and it took a really long time for me to get it off. Using nail polish as adhesive worked just fine.

Finally, all you have to do is draw three white dots on the strawberry, wait for it to dry and apply a top coat! It's pretty simple but it does require concentration and patience. Especially while waiting for the gradient nail art to dry!

I hope you enjoyed this tutorial, till next time, Byee~~

Sunday, 3 July 2011

BK Fashion Nail Color 01 Swatch with Konad Plate M56

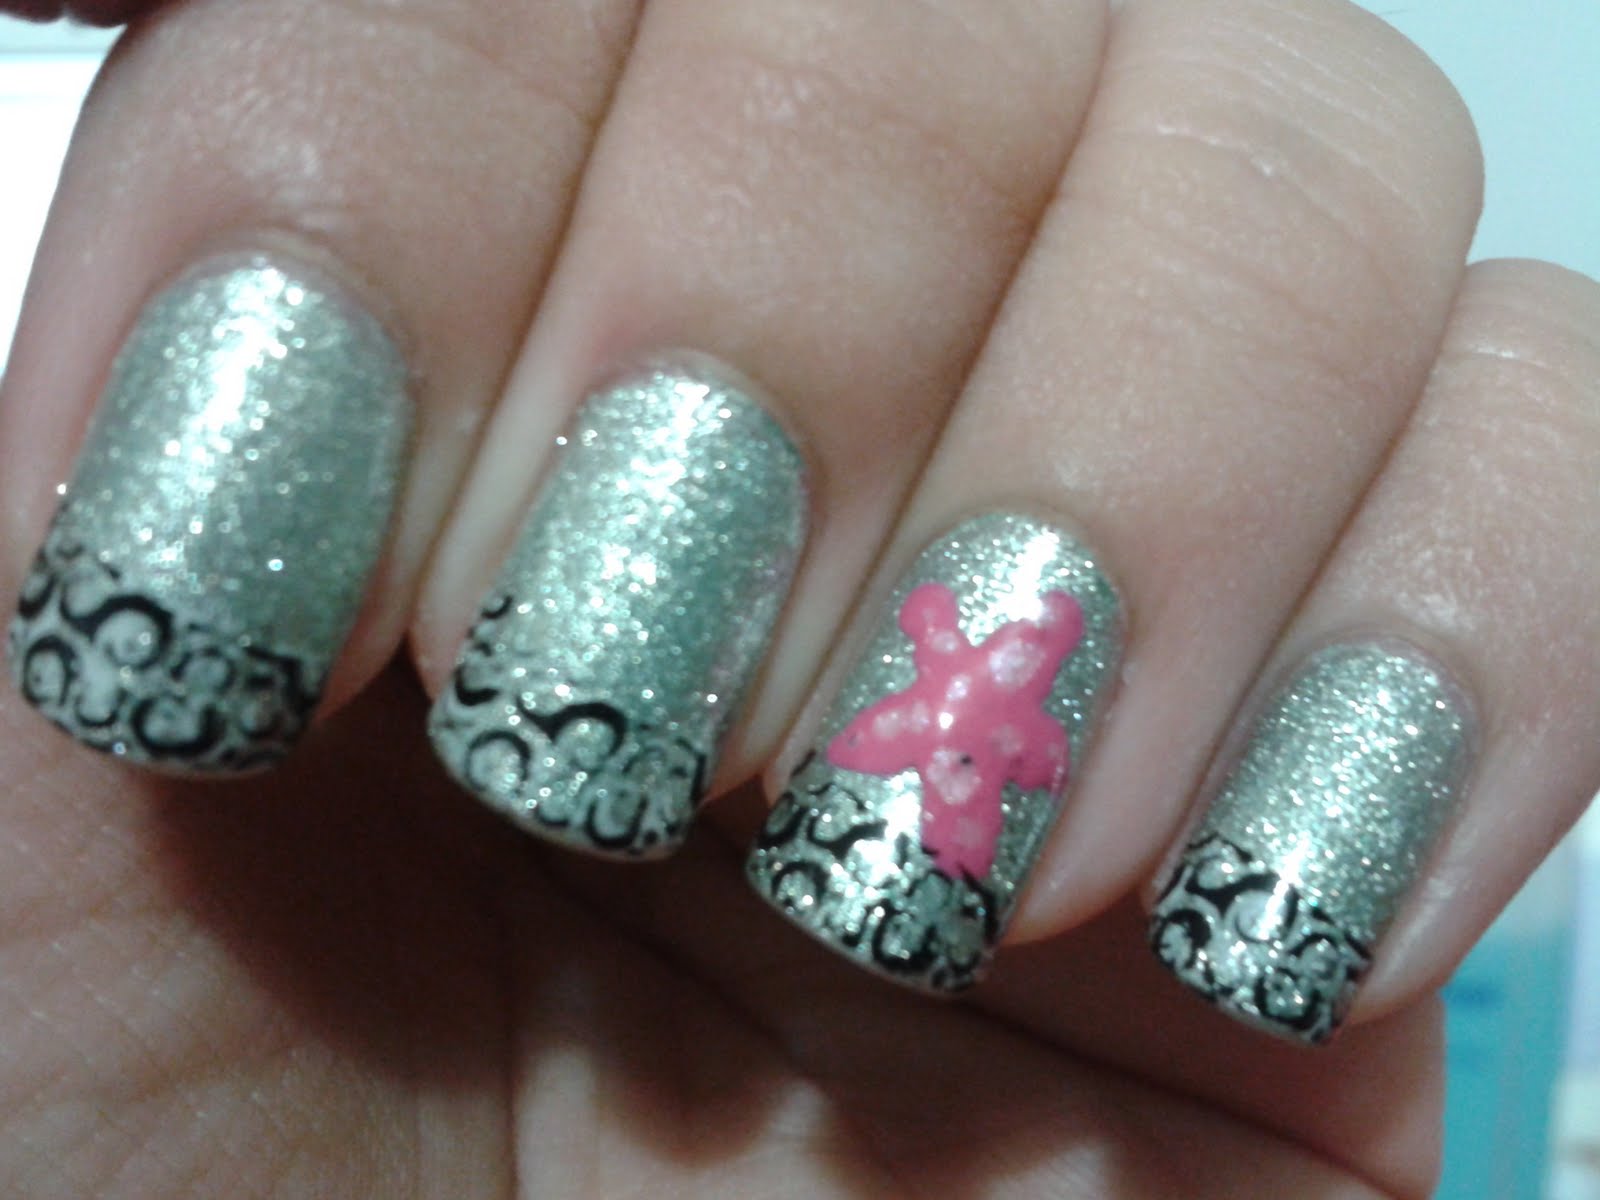
Hi everyone! I've been really busy these few weeks and my schedule has just been so packed! Well I'm off to camp now and I wanted a really funky nail art that people would notice, so I tried out a super glittery sea green from BK Fashion Nail Color that I bought online.

Here are the things I used in this manicure:
Base and Top coat
BK Fashion Nail Polish 01
Konad Plate M56
Konad Special Polish black
Two-way Nail Brush and Pen dark pink and light pink
Konad Top Coat

Since the previous BK color applied like a dream, I had high hopes for this one and it didn't disappoint. It applied beautifully and was opaque in two coats. The glitter is also really fine, much finer than that in the golden color I tried last time. With a top coat and a Konad top coat, this manicure is completely smooth.

Because this is a sea green, I decided to go with the wave pattern from Konad Plate M56. It didn't show up very well in white, so I went over with black using the same pattern. It was a really intricate pattern and I'm rather disappointed that it didn't show up that well. I'll try practicing more I guess.

After that I drew a starfish in dark and light pink using my nail pens. It turned out really well heehee.

Till next time, Byeee~

Thursday, 23 June 2011

Night Sky Themed Nails

Remember when I said in the last post that I'll be doing nail art that's not featuring the night sky using star shaped rhinestones? Well I failed. So here it is, night sky themed nail art.

A couple of people have asked for nail tutorials but since I'm not great at taking videos, here's a picture tutorial.

Here are the products I used:
Base and Top Coat
BK nail polish in colour 15 (matte black)
Rainbow nail polish in colour 55 (random glitter polish)
Two-way Nail Brush & Pen in yellow, black, white and red
Star shaped rhinestones

I got the matte black nail polish and star shaped rhinestones from online.

Before I start, let me just say that I'm not great at applying nail polish on my nails. I always get it on my cuticles and I usually just peel off the polish the next day after my shower. Now that we've got that out of the way, let's start!


First we apply matte black polish (or regular polish) to all of your nails. This black was a wonderful velvety pure black and it's opaque in just one coat *thumbs up* (I have no idea what was up with the wrinkle. Must have bumped it while taking the picture)


After that, go over your nails just once with the random glitter polish. This is just to make your nail art more interesting. I wanted to have a really over the top nail art this time. As you can see the matte effect doesn't last when something else is on it so it would be better to just use a regular polish. I do not have any other black polishes, so I had to use this one.


Once you're done with the glitter, you apply the star-shaped rhinestones like so, and draw a crescent moon on your thumb and a star shape on your ring finger using the nail art brush or a tooth pick. I placed the orange star in the middle just to jazz it up a little. Also, I didn't want to use up all my white stars. (Star-shaped rhinestones review below)


Wait a little while for the yellow to dry, then add in the details for your moon and star. I drew faces on the both of them and gave the moon a large red nose. Don't forget to add the white spark in their eyes so they look more alive.

Finally! To pull the whole look together, I put an orange star on my thumb and ring finger too. Scroll to the top of the post to get the final look.

I love it. It's so adorable! One thing I would say about the star shaped rhinestones, is that their 'yellow' stars aren't yellow enough. There's orange, and there's a lighter orange. I do love the black stars though. It's so cool. Stars are my favourite shape so I'll probably use it instead of regular rhinestones when I want to spice up a nail art.

I've thought of a new and improved strawberry nail art! Might do it soon so keep an eye on this page. Till next time, Byeee~~

Tuesday, 14 June 2011

Strawberry nails!


Hi everyone! Recently I went shopping and I came across a few Fimo sticks and I bought one that looked like a strawberry cut in half. Ever since then I have been dying to use it and finally I did!

I must say the accent nail was quite a disappointment. Cutting the Fimo pieces took abit of practice, and somehow, it doesn't look as satisfying. Doesn't matter though I'm sure I can think of other nail designs for this Fimo shape.

Here are the things I used for this design:
Base and top coat
The Face Shop RD 301
Sally Hansen's Insta-Dri in Mint Sprig
Two-way Nail Art Pen and Brush in white and green
that Fimo cane stick
Nail glue
For the non-accented nails, I painted half of the nail red, and then drew in the leaves using the nail art pen. After that, I used the nail art pen to dot in the seeds. I've tried dotting in more than 3 seeds, but they just looked odd. 3 seeds seemed to look the best.

For the accented nails, I used Sallen Hansen's Insta Dri in Mint Sprig to create a french tip, then I stuck on the Fimo at the side. I tried drawing in leaves, but my leaves were too small. So I just covered the too-small leaves with the Fimo pieces.

Everything looks great, I mean the strawberries are adorable (maybe one day I should give the strawberries cute faces). But! My accent nails are a disappointment. Gotta think of something with more oomph!

I was gonna remove the nail polish immediately after taking pictures, but it has grown on me. Maybe I'll keep it for a while. Till next time! Byeee~~

Sunday, 5 June 2011

Panda Nail Art!: The Face Shop PP401 with Konad M56, S10 and M10


Hi all! Today is probably one of the most time consuming but rewarding nail art for me. I was inspired by this nail art that my cousin did.
Also I found an awesome website here, giving lots of tips about how to do a good Konad tutorial. She recommended changing from a metal scraper to a plastic scraper or an old credit card. I used an old ATM card, and it worked like a dream. Seriously, it was the best Konad I've done so far. Awesomeness.

Here're the things I've used for this nail art:
Top and Base Coat
The Face Shop PP401
Black Special Polish
Konad Top Coat
China Glaze Jolly Holly (for the leafy bottom)
Konad plates M56, M10 and S10
Remember the Easter nail art I did? Here's the long promised swatch of this awesome super light, frosty pink. I used it as the base for the Panda nail art.
After that I Konad-ed on the pandas using Konad plates M10 and S10. See that panda in a one piece suit with a hoodie (on my index finger)? So cute. Then I drew on the pandas on my thumb and ring finger using the Two-way Nail Brush and Pen. Tip here, don't squeeze out a large blob. It'll take forever to dry. Also it'll start to spread when it dries. ><
Then after waiting for the pandas to dry, I Konad-ed on the leafy french tip (looks like bamboo! or a forest..) using China Glaze's Jolly Holly. Top it off with the Konad top coat and you're done!

The Konad top coat is to prevent smudging of the Konad prints. Using this top coat there is no problem with smudging whatsoever. Great stuff!

So there you go, I know it looks slightly messy up close and there's that scratch on my index finger...but from far it looks so adorable! Till next time, byeee~

Tuesday, 10 May 2011

Flower French-tip!

For this look I used:

Seaspray from China Glaze
Millenium from China Glaze
Base coat and top coat
Black two-way nail brush and pen

Seaspray was such a pleasure to paint with. I must admit the brush took a little bit of getting used to. It's pretty narrow, but once you get used to the amount of polish you're supposed to have on the brush it works like a charm. It does tend to dry on the brush though, so I suggest doing it in a room without any drafts. Meaning no fans and preferably no aircon. Both Seaspray and Millenium were so pigmented! I'm very impressed. Seaspray is a wonderful blue-gray, and under artificial light you can just about see shimmers in the polish. It sorta comes and goes. But I love it. My nails are so pretty they distract me from my revision. Ha!

For a regular french tip, put the tip on one end of the finger, and just rotate your finger and let the brush paint the tip of your nail. It's hard to explain, but I'll put the video where i learnt it from some day. To get a more natural look, you can follow the actual whites of your nails. Try to estimate it. Also, if you mess up, no worries. Sure I messed up too but no one can really tell from far. By the way, Millenium is SO pigmented. That is just one coat!

For the dotted look I must admit it was pretty hard for me. I wasn't well, and my hands tend to shiver especially when I'm trying to do something very delicate. For the bigger dots I used the pen tip, and smaller dots I used a toothpick. Alternatively you could use a dotting tool and a toothpick with a black polish (I don't have black polish!) Basically, you put three dots down the middle of your nail, two at the sides, and two tiny dots in between each large dot.

For the flower look, it's much easier. I did this because I completely messed up the dots when I tried doing it with my left hand. After putting the french-tip, just put five dots close together (but not so close that they touch each other) and then using a toothpick, drag the polish from the middle of the dot toward the centre of the flower. After that, I put some clear polish in the middle of the flower and placed a rhinestone there using a matchstick. The flower is so pretty!

This is one of my more elegant designs. I wanted to do a full nail konad, but it takes time and patience. Both of which I don't have at the moment, so I just did this. It makes me happy when I see it. Heehee! Feel free to change the colour around, the only reason I used Seaspray and Millenium was because I couldn't wait to try those colours haha.

Maybe I'll do a gradient nail art next time? We'll see ;)

Saturday, 23 April 2011

Happy Easter!

Warning: This is a pretty lengthy post.

Happy Easter everyone! I got my inspiration at this post from www.frmheadtotoe.com. Ya know, I didn't really think about doing a tutorial till I was done with both hands. Shows you how smart I am huh.

Anyway, here is what I used for my Easter nail art. I used pastel colours as a base, and painted a rabbit on my index finger, a chick on my ring finger, and painted the rest to look like Easter eggs. I googled "Easter eggs patterns" so I know what to draw heehee.
First I used a Faceshop basecoat, and the polishes are named accordingly from thumb to pinky.

Thumb: Gargantuan Green Grape by OPI
Index: PP401 by The Faceshop
Middle: BL602 by The Faceshop
Ring: Fiercely Fiona by OPI
Pinky: 63 by Rainbow (a random brand from Sasa)

To paint in the bunnies and dot my nails, I used my two-way nail brush and pen. It really is very handy and I find it so much easier to do nail art now as compared to using brushes or tape-stencils* or matches/toothpicks.

Unfortunately the two-way nail brush and pen does not colour code their nail polish so I can't tell you exactly what I used.

Thumb:
Because the thumbnail is the biggest nail I decided to do the most intricate pattern on it. On top of a pastel green I used a hot pink to zigzag across the nail and then an orange to outline it. It was supposed to be a sparkly orange, but somehow the sparkles didn't transfer to the tip. It still looks ok though. The nail still looked empty, so I accentuated it using yellow dots.

Index:
Have you ever realised that when you point at things or order something from the menu you would be showing your index finger (unless you normally point with your middle finger). So I used the most eye-catching pattern on my index finger. I used PP401 by the Faceshop as a base, and outlined a bunny before filling the rest in. That pink is so cute! It's got a pearly sheen and it's such a delicate pink. Perfect for bunnies. I suggest putting in as little black as possible. After that dot two ovals for eyes, and one red dot for the nose. Then dot the eyes with a tiny bit of white. That way it'll look more lively :)

Middle:
The middle finger is still reasonably big, so I drew purple stripes across the blue nail. I must say it turned out really nicely. Definitely doing this for all my nails someday when Easter is over. I did vertical stripes for my right middle finger. If you do try out vertical stripes, draw thinner stripes.

Ring:
The chick is probable one of the easiest to draw, because all you really need to do is dot the eyes (both white and black), and draw a little triangle for the chick's beak. I don't really know what I can do to make it look more chick-like. Jen from frmheadtotoe had jagged white eggshells at the bottom which I didn't bother myself with. But when I showed it to my sister she thought it was a happy face. So now I can't look at my chick without thinking about happy faces xD

Pinky:
The easiest to do! I like dots. Somehow something that is so simple can jazz up your nail. I used white from the two-way nail brush and pen to dot all over. But using a toothpick or matchstick (depending on how big you want your dots) will do fine too. I over-dotted my pinky in the picture. But on the other finger, it has less dots and it looks better than the over-dotted pinky.

So in case you want to attempt nail art from one of the nails without attempting the whole thing, here they are in order of difficulty from most difficult to easiest:

1) Rabbit
2)Zig-zag easter egg
3) Stripes
4) Chick
5) Dots

I feel like this is a really text-heavy post. I should take more pics during the painting process. This whole nail art probably took me about 3 hours including drying time. I topped it all off with the Faceshop top coat. That is all for today. Bye~

*I don't know what the real name is called but to do nail art easily you can cut out the shape of your nail art, stick it onto the nail and colour in the background. Yep. So. Much. Effort!

Friday, 1 April 2011

Haul from Ebay!

So! I went on a shopping spree on eBay last month and the stuff arrived the past week. It's so exciting getting packages in the mail. I love opening packages. Anyway! Here are details about the products, like how much I got it for, and where I got it, etc. Because I know it's so hard to find cool stuff for nails in Singapore at cheap prices.

Konad Nail Art Image Plate M61:
I bid for this on eBay because it's slightly cheaper. In Singapore you can get it from stores for $7.90, but on eBay through careful bidding I only needed to pay US$5.14 for this (which is $6+ SGD). Shipping is free, and it is from the Konad brand, so if you don't mind waiting I think it's good to just bid and buy it on eBay. Check out the seller here.

120 pcs Fruit Fimo Slick Nail Art Rods Stick w/ Glue:
I bid for this one and through pure luck, it at just US$1.50 heehee. You can go ahead to search for them and look for cheap ones. The seller sells quite a lot of cosmetics (like acrylic nails, falsies), you can check her out here.

1800 Nail Art Rhinestones Glitters Round Wheel:
Rhinestones are bought at US$1.80 with free shipping, there are 1800 pieces in that whole wheel. Colours are so pretty! Because it's so cheap, some of the pieces might be oddly shaped or not the same size. But that's ok, once you put it on the nail you hardly notice the difference! If you're interested you can get it for US$2.80 here but once again, I suggest you search for it on eBay and buy the cheapest one there.

48 pcs Two-way Nail Art Brush & Pen:
The pen is a nib where you can just squeeze out nail polish to either dot or draw on your nails. The brush is a really thin brush for you to do french tips or just to draw designs of your own.

This whole set (all 48 pieces!) cost me US$28 ($14 for the product, $14 for shipping). I bought it from the seller butterflybeauty168 so you can check out her shop, or even just search for this on eBay. I'm sure you can find it cheaper than what I got.

In case you're lazy to search, you can check it out here.

So here it is. What I bought, where I bought it and for how much. I'm such an eBay junkie and as long as people keep putting cheap stuff up, I will always go to eBay for good deals.