Showing posts with label China Glaze. Show all posts

Thursday, 9 August 2012

Yellowy Sunshine Goodness!


Hi all! This nail art occurred purely by accident but I must admit I do like it. Pluses of having long nails is that you can get to do french tips without must difficulty (ie the polish won't get onto your cuticles heh).

So this started off innocently enough with OPI's Fiercely Fiona as base and China Glaze's Sunshine as a slight glitter gradient tip. You can click here for a swatch on Fiercely Fiona. You can also click here to see how I used Fiercely Fiona with other colors to create an Easter themed nail art.

I have never used Sunshine from China Glaze as a swatch before. At least, I've never had it on long enough to take pictures with. Truth is, it was just too sheer to be used on it's own. So I'm only going to use it for layering. You can click here to see a swatch I did with a wonderful glittery orange that I bought together with Sunshine though :) It's awesome because it's got tiger stripes in it.

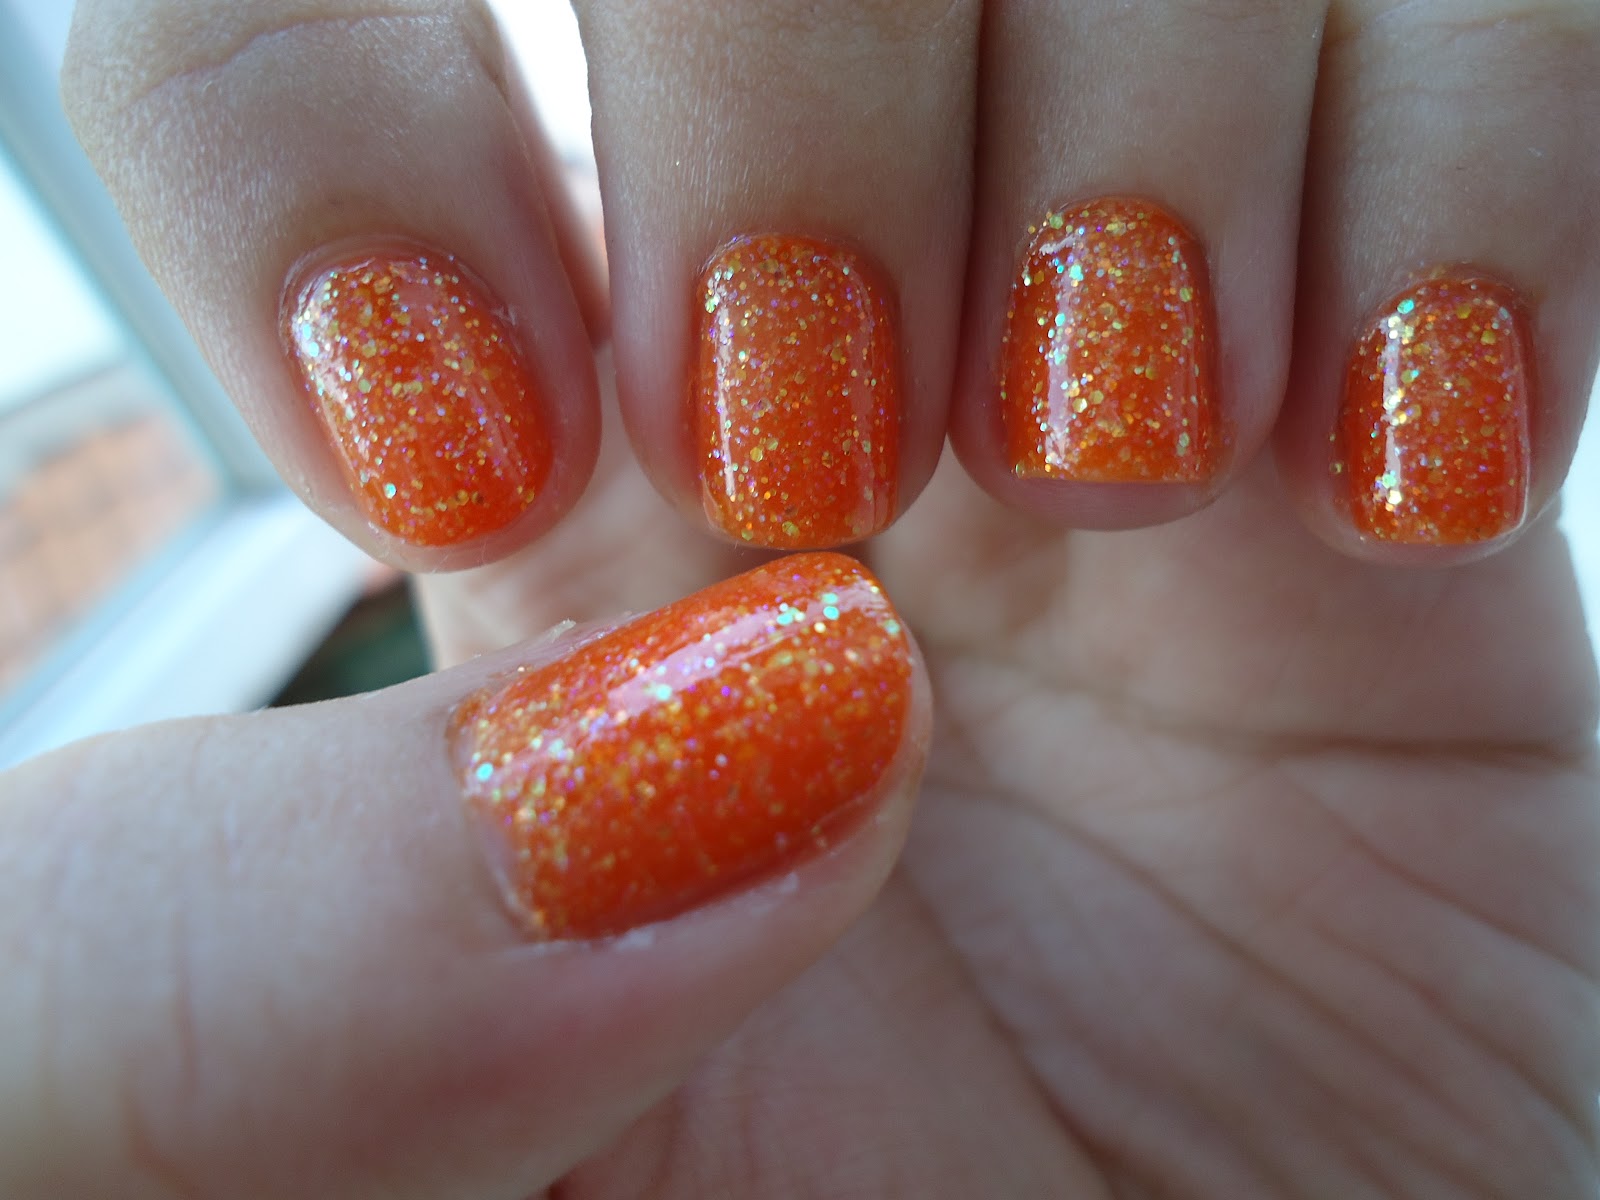
 I love the Sunshine glitter on this one because they have a slight holo effect which is really subtle. You can see the flash of pink on my index finger above.

 And here you can see more glitter it really depends on how you see it.

 Can you see the green flashes on my middle finger? It does have more effect in real life. Trying to catch these elusive glitters is an exhausting job.

 Eventually though I gave up on being subtle and covered the whole nail with Sunshine. Hurray for glitter!
This is what it looks like while layered over Fiercely Fiona. 

I loved it so much that after a few days I decided to french tip it when the tips wore off. I chose a not-so-loud dusky gold. I forgot which brand...I think it was BK but I have yet to do a swatch on it.

So that's all for today! As usual, if you haven't already do like my facebook page/shop here. Feel free to buy anything from me :P Till next time, Byee~
Monday, 23 July 2012

Triple Color Free Hand!


Hi guys! For this nail art I did everything free hand and even tried to use rhinestones to jazz it up a little. Here's a pictorial :)

Right, as a base color I had Bogie from China Glaze, which was a mistake, it made everything that much darker and ancient looking. You can click here for a swatch.

Then going diagonally I used a no brand polish that was a present from my cousin. (It's Rainbow brand I don't even know if Sasa still sells them it's ancient)

To top it all off I went diagonally again with Nubar's Purple Beach. I have no idea why I sandwiched that pink between two deep purples...it just makes the whole nail art so dark. You can click here for a swatch of Purple Beach.

Then after that just border the lines of the colors with rhinestones. This actually allows you more freedom in freehanding. The rhinestones would cover up any wonky lines you might have accidentally made. But putting so many is such hard work...so I only did it on my thumb and ring finger. You can click here to see all the different nail art designs I've done using rhinestones :)

As you can see my thumb's color lines are parallel to each other as opposed to dividing my nails into 3 triangles like my other fingers. You can really do it any way you want it as long as your brush is thin enough :)

That's all for today, sorry my hiatus took longer than expected :/ But! As usual, if you haven't already do like my Facebook page (which is also a shop) so that you have the latest on what nail art I'm doing and blog posts that come up. Do follow my blog if you like what you see here :) Till next time then, Byee~

Tuesday, 3 July 2012

Harry Potter Nails!

Hi everyone! What with the Harry Potter exhibition being in Singapore and all, I decided to do some Harry Potter inspired nails :) I had a Slytherin one, while my friend did Gryffindor's. I also managed to do a pictorial! This is easier than it looks, really and all you need is a steady hand and a calm mind. Heh. Here goes!

1) Using any color of your choice, carefully paint half of your nail lengthwise.

2) Using another color (I used a golden green instead of a silver because I felt it complemented the forest green better) fill in the other half of the nail.

3) Then using the other color (golden green) paint the top half of the forest green.

4) Using forest green, go over the top half of golden green, giving you the pattern you see on my middle, ring and little finger.

5) Optional: Paint a top coat and carefully apply a rhinestone (I used light green) in the middle of the nail. This allows you to cover up any imperfections. For example, if the centre of the nail is not perfectly right-angled.

6) Optional: If you like, you can place a few 3D steel balls along the lines where the colors meet. I felt it made the design too messy so I stopped after doing 3 nails.

This is what I was left with! Tada! Products I used for Slytherin nails were Jolly Holly and Peace on Earth from China Glaze. Click here for the swatch and review of Peace on Earth and here for other nail art I have done with it. Click here for a swatch of Jolly Holly and here for a nail design where I used Jolly Holly as a konad polish.

Products used for my friend's Gryffindor nails is BK nail polish in color 06 (gold) and Faceshop's RD301 (red). Click here for a swatch on BK nail polish and here for a swatch and konad nail art of Faceshop's RD301. I have also used Faceshop's RD301 in strawberry nail designs which can be found here and here.

For both nail designs I have used round rhinestones which can be found in my shop on Facebook. You can click here to see my first attempts with rhinestones, here to see how I paired up rhinestones with konading, and here to see how I used rhinestones to create a classy nail look.

3D steel balls were used on 3 of my nails, you can click here to see how I used them to create sea themed nails. 3D steel balls can also be found in my shop on Facebook.

Sorry for the lengthy post, I really hope you enjoyed this pictorial, There is yet another one coming up in the next post! So as always, if you haven't already give my Facebook shop a like so you can keep up to date with the latest blog posts and deals. And till next time, Byee~

Monday, 2 July 2012

Fishtail Braid Nails!

 Hi all! This time I got adventurous and did some free hand nail art :) Also I wanted to try out my new All That Glitters polish, Hole Hearted. It's a chunky black glitter polish in a clear base with white hearts :) You can see it layered over China Glaze's Millennium on my ring finger in the photo.

To match Hole Hearted, I went for a silver, black and white theme. the wonderfully reflective silver was China Glaze's Millennium. Click here, here and here to see how I used this polish as a base in nail art.  Click here to see how I've used Millennium as a konading polish and here to see how I've used it as a french tip :)

The white for the braid was from Etude House. I have used this in a Hello Kitty nail art previously, and also as a base for a splotchy cow nail art.

The black was a random brand that I bought online and have yet to do a review on it heh.
The fishtail braid is surprisingly easy to do and the only thing I dislike about it is that Millennium is so reflective that under the sun I can only see the black standing out against the white. Also, the angle of my braid could have been smaller. I made a right mess of my cuticles while doing this, so there was no pictorial (sorry!) but rest assured! The next couple of posts will have pictorials in them!

Here comes the review on All That Glitters. I bought it because there was a huge hoo-ha about it and I do admit it does look wonderful in swatches, so I had high hopes for it. I was a little disappointed, the glitter was too heavy and it fell from the brush, leaving a whole load of clear polish and not many chunks. It took so much effort for me to get that white heart out too! Maybe I shall try it again soon because I just will not believe that a highly sought after polish like Hole Hearted is sub-par.

So! I have been slightly late but this was an interesting nail art no? Once again! If you have not already go take a look at my Facebook store and give it a like! There you will receive updates on my latest blog news and occasionally pictures of what I'm doing with my nails :) Also, there will be more interesting nail art coming up in the next post! Till next time, Byee~

Thursday, 7 June 2012

Classy nails!: China Glaze Millenium and M61 Konad

Hi all! Today I'm showing you what I did for my cousin's wedding this time round. Last year I did another wedding nail art which I wasn't comfortable with. But this time round I really loved it and I received so many compliments. :)

I cut my nails short every now and again simply because I cannot stand to have it too long. So while having short nails I took the opportunity to try out a classy full nail pattern from konad plate M61. I have not used it before because it didn't appeal to me but I loved it. 
Because I had an anniversary dinner with le boyfriend the day before the wedding, I wanted this to be versatile and go with everything (I was wearing contrasting outfits). So silver and black were chosen. As the base color I used China Glaze's Millenium, a swatch can be found here.

That was a few weeks ago, thus far I have been doing my nails consistently and have also been resting them. More blog posts to come! I am currently having a nail sticker sale at 10% off all nail stickers at my store for just this week. Go show it some love and if you see what you like, do buy something! Till next time, Byee~

Wednesday, 9 May 2012

Orange Gradient Nail Art Tutorial!

Hi all! It's been a while since I posted, and I do have exciting things lined up today! So, last week, I went around to filming and editing a gradient tutorial! *clap clap*

So, to start off with, I had a base color using Etude House's HD nail polish (OR205) in Orange. I have previously a swatch on it, you can check it out here. To do the gradient I used a favourite of mine, China Glaze's Dreamsicle. A swatch and nail art post can be found here.

Without further ado, here's my video!


I'm thinking of not talking altogether while doing nail art. It really takes up a lot of my concentration and I sound all distracted and unenthusiastic.

More photos! I took this right after I finished doing my nails so I didn't have time to scrap off the top coat that got onto my cuticles. 

A blurry shot to shot off the wonderful flashes of colour from Dreamsicle!

Aaand fun with water decals. I've already filmed that tutorial and I have yet to edit it! Aren't you guys just to excited heh.

That's all for today! I have to get working on my water decal video editing and do lots of stuff! To buy water decals, click here. Go ahead, show my shop some love. You know you want to. Till next time, Byee~

Thursday, 26 April 2012

Sea-themed Nails

Hi again! Ever since I bought 3D Steel Balls as stock for my shop I have always wanted to try them. And once again, I decided on a sea themed nail art. Some how sea-themed nail art is the easiest haha. Did one previously here you can go check it out if you want :)

So anyway! I used China Glaze's Sea Spray (check out swatch/nail art I did here) as a base colour and China Glaze's Blue Hawaiin glitter polish for the gradient look. Did it while I was studying. Best time to do gradients by the way, I can put on a layer of polish for each page. And that stops the polish from dragging when you put a new coat of polish on layers that are not that dry.

This is what I ended up with after I put on the steel beads. After the exams I'm really going to put up a tutorial for gradients and apply 3D Steel Balls. Honest. I love that it pops out and seems to stick there on its own. So pretty too.

Here's a more colour accurate picture. Please ignore the smudges at the edges of my nails. There wasn't that much going on on this hand because I was still getting the hang of it.

And here, is my left hand! My favourite finger (if you can put it that way) for this nail art is probably on my index finger. Very swishy looking if you ask me. 

Here's a clearer picture. I love it and the gradient really turned out well! So pretty. Can't wait to try it again! Wonder what colours I should use for a gradient tutorial. What do you guys think?

So that's all for today! I daresay the next nail art will still be a gradient, so that I can film a tutorial. Should I still put the steel balls in then? Hmmm...Before you go, if you're interested in getting the steel balls from me you can go to my shop, the link takes you straight to the item. Go like the page too! So that you can participate in giveaways! Till next time, Byee~

Friday, 24 February 2012

Tiger Nails :D

Hi guys! I went to the Beautyexpo yesterday and bought some really cool China Glaze Polishes. Couldn't wait to try them on!! Hehe so I did a swatch of one of the polishes for you guys :)

First one I tried was Dreamsicle. This is a really glittery orange and when I put it on it felt very sheer. Swatches are hard to come by with a Google search. Ones I did find though managed to achieve opacity with 3 coats. Maybe my coats were just too thin? This is with 4-5 coats. I love the glitter in it and it just looks so happy!

Photo below is more true to life. Maybe mine is a redder shade than others because I applied so many coats haha!

On top of the orange I put some stripes. I've always wanted to have tiger stripes on an orange color. So it looks like a tiger. Well this tiger is going places y'all! 

Here you can see flashes of green and pink. It really is something you can stare at for hours on end. :)

Yet another close up. I love this manicure so much! The color really makes me smile.
That's all for now. Ever since I went to the Beautyexpo I have been thinking about starting a small business. What do you guys think? Will you support me? ;) That's all for now. Till next time, Byee~

UPDATE: While on the care the next day, I realised that my nails match my bag perfectly. Was so pleased I took a photo. Look at how pretty the sparkles are!! 

Wednesday, 15 February 2012

More Fimo and Acrylic Fun!

Hi all! Here I am, once again, to update you on everything I did with my nails so far! Anyways, I experimented it with gel nails. This was done professionally in a salon, I had a Groupon for it so why not eh? I loved it! It was super shiny, it didn't chip no matter how roughly I treated it. I swear. I was cutting fruit one day and I accidentally scratched the nail, when I looked at it a few hours later it was gone! O.o
 This was a deep navy blue with awesome blue and purply-pink flakies. I love it so much!
 You can see a little bit of blue here...
The only drawback was that it was really hard to remove. Technically I should have gone to a salon to do it but being a student and all, I'm constantly broke (and shopping). So I DIY-ed it. It took me nearly two hours!

Next up! I went on a little spree, and I came back with 100 fimo pieces, three acrylic molds, 20 sets of nail stickers, and those little metal ball things. I think I paid not more than $40. What a steal! :D

Now I immediately got set to cutting up my fimo pieces. A few of them were like this, a little chipped at the sides, but really it doesn't make a difference once you slice it up. 
Little chickies all cut up!
Just to let you guys know, with the 100 piece fimo set, the store also provided me with two plastic decks (like the one seen above), super glue, and a pack of razors to cut the fimo sticks with. No lie, those razors are so awesome for cutting the sticks. Much easier than using a pen knife.The glue just looked like regular super glue, so I didn't use it. I usually just stick the fimo onto my wet polish anyway and it seems to work well enough.

Closer to Chinese New Year, there was this store Smoochiezz having a road show, and I simply could not resist getting this China Glaze golden shimmer top coat and red-silver glitter. Awesome!

 Here are my Chinese New Year nails! I was really short of time, so I used my trusty Faceshop red nail polish and just layered it with the China Glaze gold glitter coat (Enchanted). Here is a blurred picture to show you the holographic goodness! I love it soo much!
 Here's a clearer picture to show you the stickers that I bought. They sell their nail stickers in packs of 10 I tell ya. So now I have like 20 sets of nail stickers hehehe...

This was done pretty recently, I cut my nails short because removing the gel nails really damaged my real nails. And I really wanted to use this cupcake pattern that I got with the 100 piece fimo set (I really do love a good bargain). So cute! The pink is from Rainbow, I think it's those that you can get for a few dollars, my cousin gave it to me so I'm not sure. It's not bad though, the pink is really pretty and doesn't make my skin look washed out.

Now on to some acrylic fun! I used the acrylic mold cos the seashell pattern was really adorable and I couldn't wait to try it! Plus, I had a color from BK Nail Polish on. And again, I did another sea-themed nail art back then. I'm so dull creative!
 
Here is my right hand! I know the purple is too dark. Problem is, I actually did choose the lightest purple I had, but the moment it touched the monomer, it became this. So...my sister and friend actually mistook it for poo. To them I had poo as nail art.
The left hand! As a side note, monomer (ie acrylic liquid) is one of the most pungent and awful smells ever. While clearing up I accidentally spilled some on my shorts and in the mad dash to the bathroom I accidentally breathed in a lot of it. Had a headache for the rest of the day.
Maybe I should buy a gas mask so that I can use my acrylics without having to breath the monomer smell in.

That's all for now! I actually did a really garish cute nail art design using my fimo sticks for Valentine's day. If all goes well, I should be posting about them soon! Having fun online shopping, and till next time, Byeee~